
Photography Tips for Safari Game Drives
Safari photography often feels intimidating before the trip begins. People imagine fast-moving animals, long lenses, complicated settings, and pressure to capture once-in-a-lifetime moments perfectly.
In reality, safari photography is far more intuitive than it sounds. It’s about understanding the rhythm of a game drive, choosing tools you’re comfortable with, and knowing when to photograph and when to simply observe. When those pieces come together, the experience becomes calmer and the images stronger.
What's in This Article:
- How to Think About Safari Photography
- Basic Composition Tips That Work Especially Well on Safari
- Should You Bring a DSLR or Mirrorless Camera, or Rely on Your Phone?
- Phone Photography Basics for Safari
- DSLR and Mirrorless Basics: Gear, Settings, and What to Prioritize
- Practical Safari Photography Tips
- Knowing When to Put the Camera Down
How to Think About Safari Photography
Safari photography is less about reaction and more about awareness. You are rarely chasing moments. More often, you’re watching behavior build, light change, and scenes unfold gradually.
Animals don’t appear on command, and the most meaningful images usually come after you’ve spent time observing rather than immediately lifting your camera. When you understand that rhythm, photography feels less stressful and more intentional.
I’ve found that travelers who give themselves permission to be present first consistently come home happier with both their photos and the experience itself. The goal is not to document everything. It’s to notice what feels meaningful and respond thoughtfully.
Basic Composition Tips That Work Especially Well on Safari
Safari offers compositional opportunities that are different from most other types of travel photography.
Leaving space in front of animals helps convey movement and intention. Paying attention to eyes and the direction of gaze creates connection. Including landscape elements adds scale and context, which often makes an image more powerful than a tight crop alone.
Environmental portraits are particularly effective on safari. An animal placed within its surroundings tells a richer story than a close-up that could have been taken anywhere. Dust, light, weather, and negative space all contribute to mood and atmosphere.
Not every image needs to be dramatic. Quiet compositions often become the ones people return to long after the trip ends.
Should You Bring a DSLR or Mirrorless Camera, or Rely on Your Phone?
There is no universal right answer, only what works best for you.
Phones can perform extremely well on safari for wider scenes, storytelling moments, and capturing light and atmosphere. Cameras with interchangeable lenses offer more reach and control, especially for distant wildlife and more deliberate compositions.
The most important factor is familiarity. A phone or camera you know well will always outperform a more advanced setup that feels unfamiliar or frustrating.
Some travelers bring both, using a camera for wildlife-focused moments and a phone for context and everyday scenes. Others prefer to simplify and stick to one device. Either approach is valid.
Phone Photography Basics for Safari
Phones shine on safari when used intentionally. They’re excellent for landscapes, silhouettes, environmental scenes, and moments that capture the feeling of being there rather than documenting a specific animal.
Clean your lens frequently, as dust builds up quickly. Use burst mode for movement. Tap to focus on eyes when possible, and default to landscape orientation, which generally works better for wildlife and scenery.
Be cautious with digital zoom. It degrades image quality quickly, so it’s often better to shoot wider and crop later. Phones are best treated as storytelling tools rather than long-range wildlife cameras.
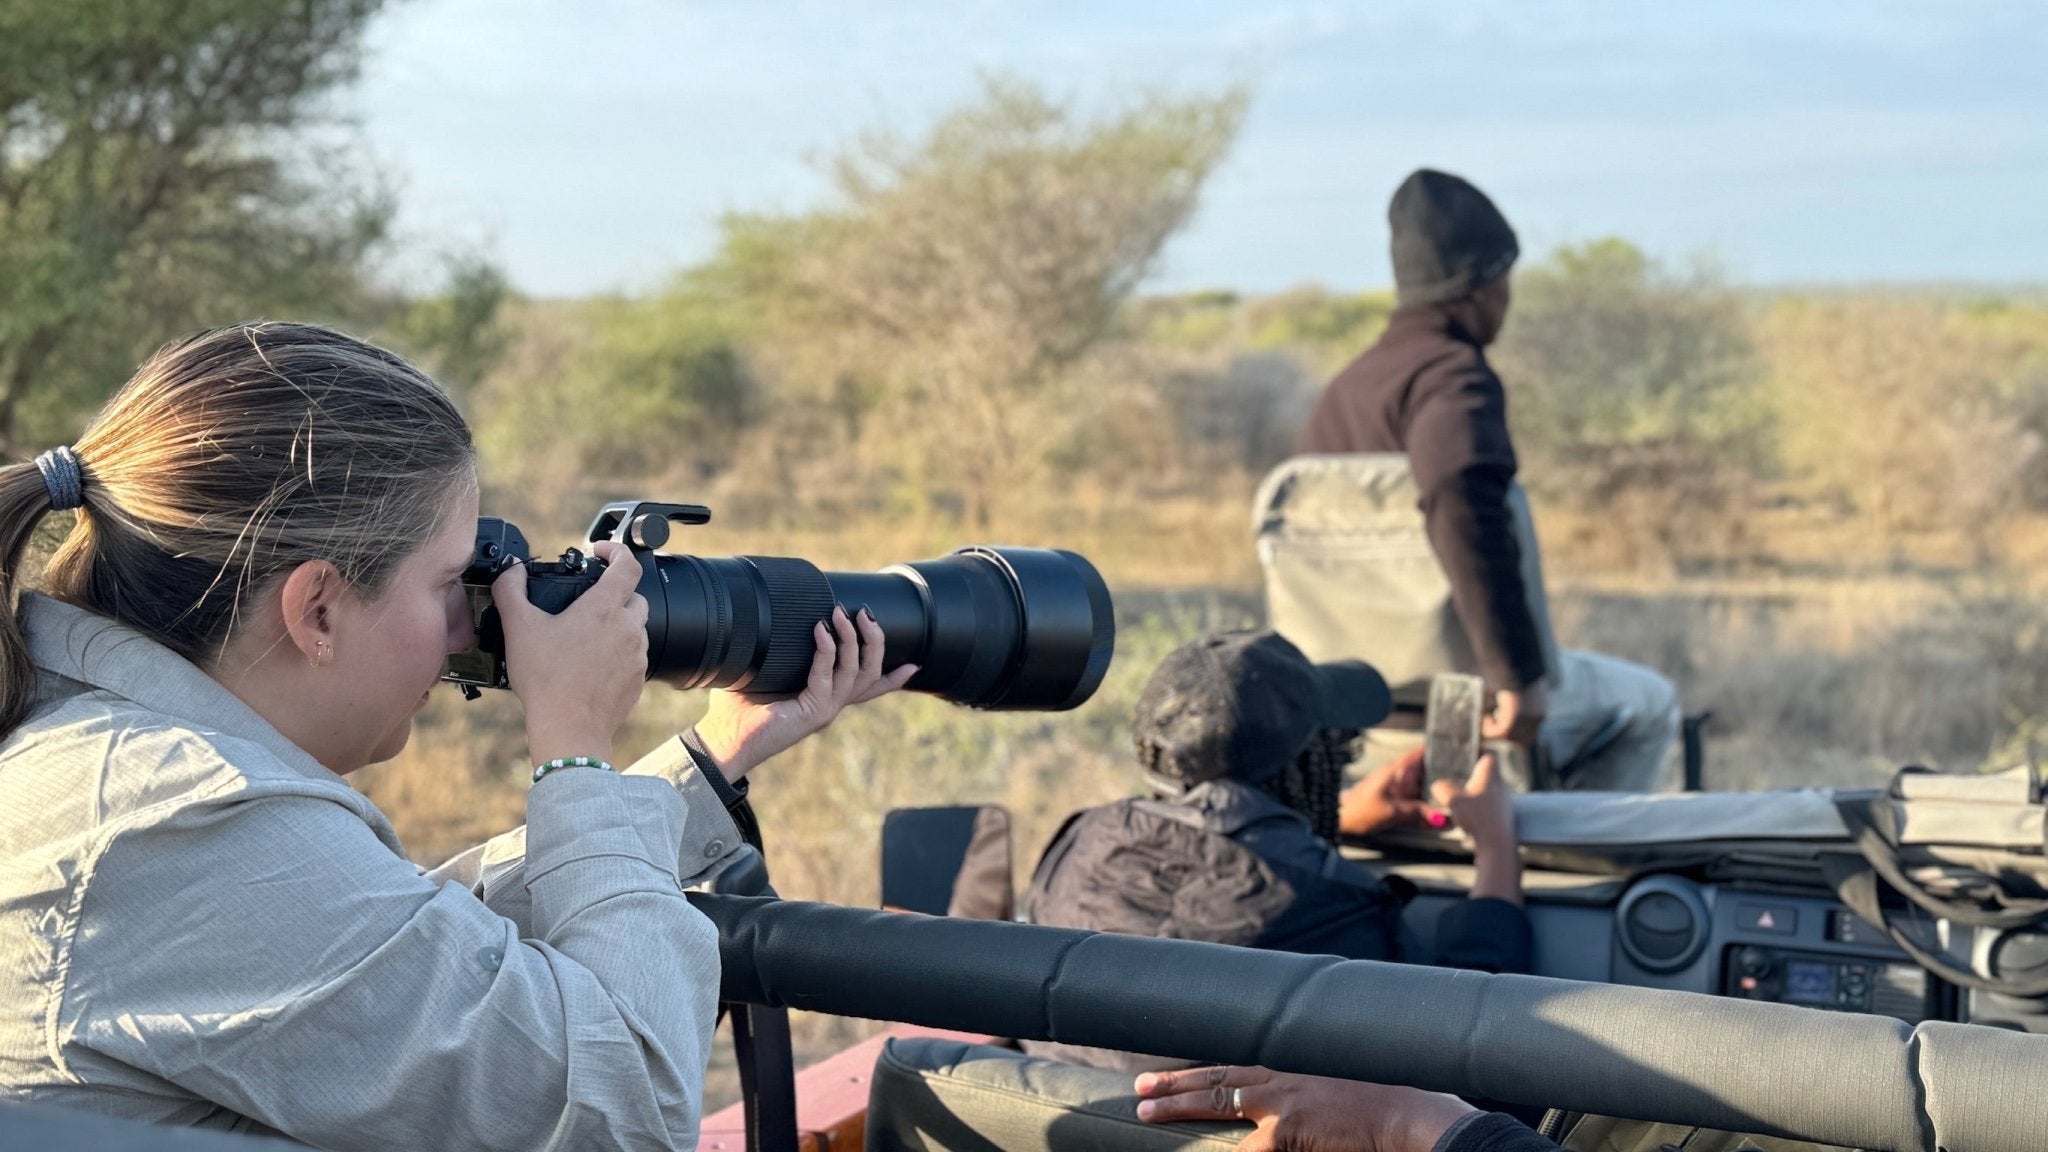
DSLR and Mirrorless Basics: Gear, Settings, and What to Prioritize
If you bring a DSLR or mirrorless camera, familiarity matters more than anything else. Safari is not the place to learn a new camera.
One of the most common mistakes travelers make is bringing brand-new gear without practicing beforehand. Safari moments unfold quickly, and frustration with unfamiliar settings can cost you both the shot and the enjoyment of the experience.
From a tactical standpoint, these approaches work especially well on safari:
- Shutter speed: Prioritize faster shutter speeds to freeze motion. A good baseline is 1/1000s for moving animals, and faster for birds or action.
- Auto ISO: Auto ISO is extremely useful on safari as light changes quickly during game drives. Set a reasonable upper limit so noise stays manageable.
- Aperture: Moderate apertures (around f/5.6–f/8) often balance sharpness and depth of field well for wildlife.
- Focus mode: Continuous autofocus is essential for moving subjects.
- Eye tracking: If your camera has animal eye-detection or tracking, use it. It can be very effective, especially for mammals.
- Burst mode: Helpful for behavior and action, but use it intentionally rather than constantly.
- Zoom lens lengths: A versatile zoom is often better than multiple lenses. Many travelers find something in the 100–400mm range ideal. Super-telephotos are not required for most safaris.
- Image stabilization: Very helpful when shooting from a vehicle.
- Simple setup: Fewer lenses and accessories usually lead to a smoother experience than overpacking.
Power management matters. Bring extra batteries and chargers. Many newer safari vehicles have power outlets or USB ports, but availability varies, so keep charging cords with you on game drives just in case.
Safari environments are dusty. A small brush, air blower, and basic sensor-cleaning supplies go a long way in keeping equipment functioning properly throughout the trip. When not actively shooting, keep your camera in a padded bag while in the vehicle. Safari roads can be unexpectedly bumpy.
Practical Safari Photography Tips (15 You’ll Be Glad You Knew)
- Keep your camera or phone easily accessible at all times
- Remove lens caps before game drives begin
- Check battery levels and memory card space before every drive
- Carry extra batteries and charging cords in your day bag
- Take advantage of vehicle power when available
- Secure loose gear on bumpy roads
- Clean lenses frequently throughout the day
- Use padded bags to protect gear between sightings
- Communicate calmly with your guide if you want to reposition
- Be patient and let moments develop
- Avoid overshooting every encounter
- Watch behavior before lifting your camera
- Pay attention to background clutter and vehicle shadows
- Protect gear from direct sun and heat
- Back up photos whenever you have downtime
Knowing When to Put the Camera Down
One of the most important photography skills on safari has nothing to do with cameras.
There will be moments when putting the camera down leads to a better experience. If you feel rushed, frustrated, or disconnected, it’s often a sign to pause and simply watch.
Some moments are better experienced fully rather than documented. Ironically, those moments often inspire better photos later, once the pressure is gone.
The best safari photographers know when to shoot and when to be still.
Final Thoughts
Some of the best safari photos are the ones you didn’t plan. A glance between animals, light filtering through dust, or a quiet moment you almost didn’t photograph.
Safari photography isn’t about chasing perfection. It’s about paying attention. When you do that, the experience deepens, and the images tend to follow naturally.
Written by Christina Trester
